
JUC-synchronized
约 805 字大约 3 分钟
JUC-synchronized
并发编程三个特性
分别是:
- 可见性
- 原子性
- 有序性
可见性:
- 有两个线程,B线程对共享变量的修改A线程可以获取到共享变量的最新值
代码demo展示效果:
private static boolean testBoolean = true;

public static void main(String[] args) throws InterruptedException {
    new Thread(()->{
        while(testBoolean){

        }
    }).start();

    Thread.sleep(2000);

    new Thread(()->{
        testBoolean = false;
    }).start();
    System.out.println(String.format("testBoolean = %s", testBoolean));
}
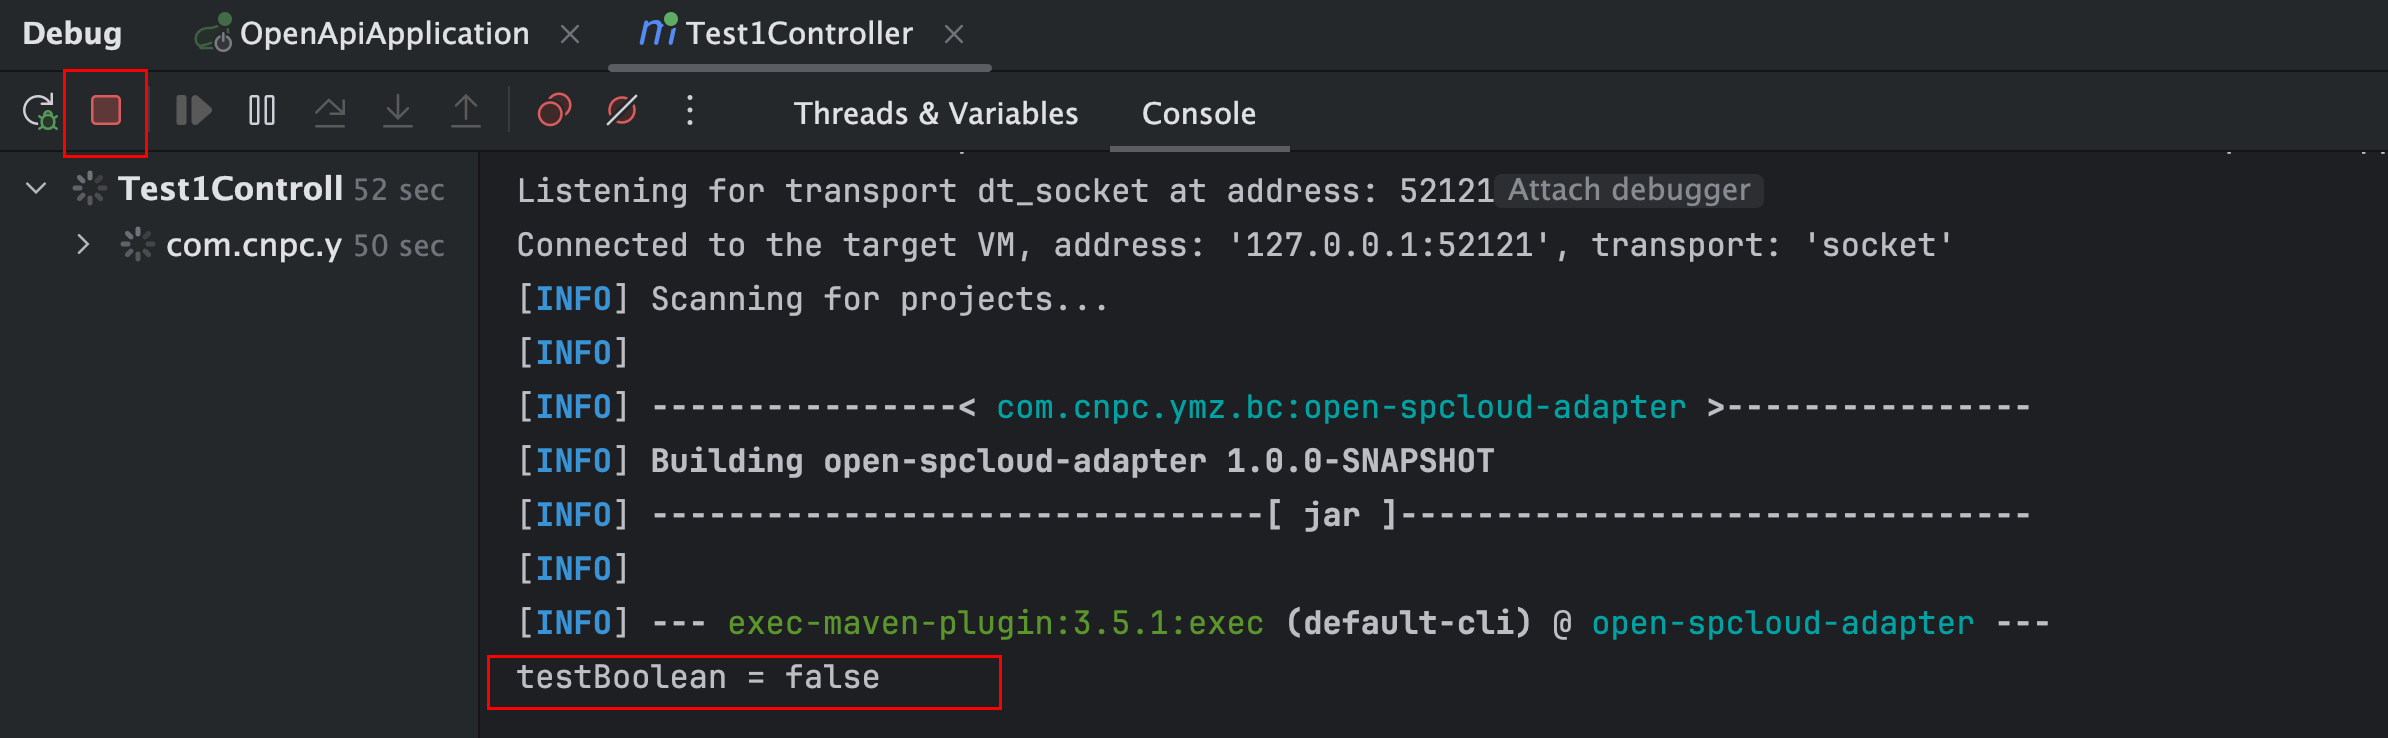
运行效果如下:
- 可以看到程序一直在运行中,没有退出,说明线程A testBoolean 的值是 true,
原子性:
- 一组操作要么全部执行完毕,要么全部不执行,不会出现部分执行,部分没执行的情况。
代码demo展示效果:
private static class Counter {
@Getter
private int count = 0;
private final Object lock = new Object();
@Getter
private final int iterations;
public Counter(int iterations) {
this.iterations = iterations;
}
// 非原子性递增
public void incrementWithoutLock() {
for (int i = 0; i < iterations; i++) {
count++;
}
}
// 原子性递增(使用锁)
public void incrementWithLock() {
for (int i = 0; i < iterations; i++) {
synchronized (lock) {
count++;
}
}
}
public void reset() {
count = 0;
}
}
public static void main(String[] args) throws InterruptedException {
int iterations = 100000;
Counter counter = new Counter(iterations);
int threadCount = 4;
// 测试非原子性操作
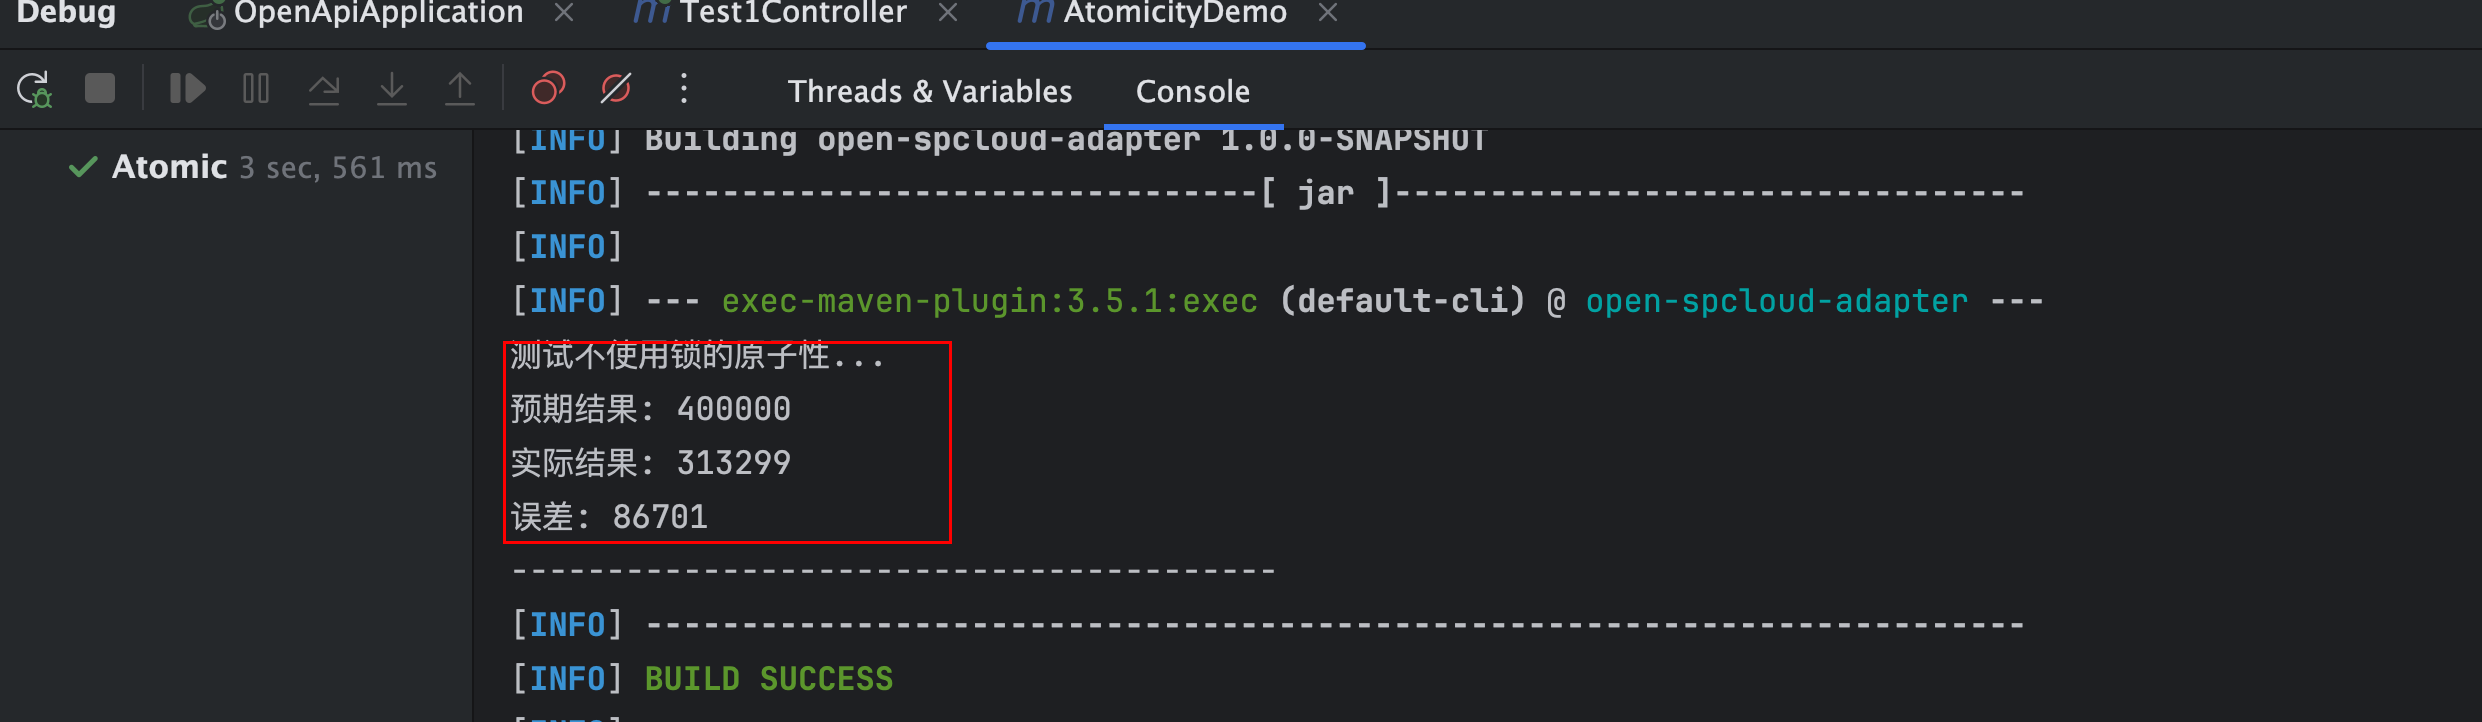
System.out.println("测试不使用锁的原子性...");
runTest(counter, threadCount, Counter::incrementWithoutLock);
// 短暂暂停以便区分两次测试
// Thread.sleep(1000);
// 测试原子性操作
// System.out.println("\n测试使用锁的原子性...");
// runTest(counter, threadCount, Counter::incrementWithLock);
}
private static void runTest(Counter counter, int threadCount, java.util.function.Consumer<Counter> incrementMethod) throws InterruptedException {
counter.reset();
Thread[] threads = new Thread[threadCount];
// 创建并启动线程
for (int i = 0; i < threadCount; i++) {
threads[i] = new Thread(() -> incrementMethod.accept(counter));
threads[i].start();
}
// 等待所有线程完成
for (Thread thread : threads) {
thread.join();
}
int expected = counter.getIterations() * threadCount;
System.out.printf("预期结果: %d%n", expected);
System.out.printf("实际结果: %d%n", counter.getCount());
System.out.printf("误差: %d%n", expected - counter.getCount());
System.out.println("----------------------------------------");
}
运行效果如下:
有序性:
- 程序执行的代码按照代码的先后顺序执行,但是在实际运行中,为了优化性能,编译器、处理器或内存系统可能会对指令进行 重排序(Reordering),导致程序执行顺序与代码顺序不一致
使用 synchronized
用法:
- 修饰实例方法
- 修饰静态方法
- 修饰代码块
分别介绍:
1、修饰实例方法
public synchronized void incrementWithSynchronized() {
    for (int i = 0; i < iterations; i++) {
        count++;
    }
}
2、修饰静态方法
3、修饰代码块
private static Object  lock = new Object();
public static void main(String[] args) {
    int count = 0;
    synchronized (lock) {
        count++;
    }
}
synchronized 原理
使用 3、修饰代码块 当中的代码,执行javac SyncDemo.java编译代码,拿到 class 文件,执行 javap -c -s -v -l SyncDemo.clas 获取反编译结果,可以看到
public static void main(java.lang.String[]);
    descriptor: ([Ljava/lang/String;)V
    flags: (0x0009) ACC_PUBLIC, ACC_STATIC
    Code:
      stack=2, locals=4, args_size=1
         0: iconst_0
         1: istore_1
         2: getstatic     #7                  // Field lock:Ljava/lang/Object;
         5: dup
         6: astore_2
         7: monitorenter
         8: iinc          1, 1
        11: aload_2
        12: monitorexit
        13: goto          21
        16: astore_3
        17: aload_2
        18: monitorexit
        19: aload_3
        20: athrow
        21: return
      Exception table:
         from    to  target type
             8    13    16   any
            16    19    16   any
通过上边查看反编译代码可以看到,synchronized是通过 monitorenter和monitorexit两个指令来实现的,其中monitorenter指向代码开始的位置,monitorexit指向代码结束的位置
可以看到有两个monitorexit指令,分别在7和18行出现,这是为了锁在代码块正常执行和出现异常情况下都能够正常释放。
Powered by Waline v3.1.3